
This tutorial will focus on using RVO2 library with Unity3D engine. At the end we will have a scene which has some number of agents aligned in a circle and going to opposite ends without hitting each other using RVO2 library.
Basically, we will get the Circle example from the RVO2 and integrate it into Unity game engine. I assume you know your way around Unity.
Disclaimer: I do not own the RVO2 library. Check this link: http://gamma.cs.unc.edu/RVO2/
Setting Up
You need naturally the unity 3d game engine. You also need the RVO2 library. A useful place to learn more about RVO2 is here: http://gamma.cs.unc.edu/RVO2/documentation/2.0/
I recommend reading it.
Getting RVO2 Library
RVO2 library is available in Python, C++ and C# at the moment. I first tried the C++ version but was not successful. Reason was that I needed the DLLs and I was using the free version of Unity. Adding DLLs required extra work which would consume time. Since Unity has C# support, I just used the C# version of RVO2 from here: http://gamma.cs.unc.edu/RVO2/downloads/.
For this tutorial, I will use RVO2 C# version 2.0.1. (Direct link RVO2 Library C# v2.0.1)
Installing RVO2 library
Name of the title may be a bit misleading. You do not need to double click, next, next into an exe file.
After you download you should have a zip file with the following contents:
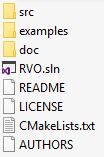
Figure 1: RVO2 library C# contents
What we are interested in is the “src” folder and its contents (all files with .cs extension).
In Unity, open a project or use an existing one and put the files to your project. What I do is creating a new folder named “RVO2” and put the scripts there and that is it.
In order to use the methods do not forget to add “using RVO;” at the top.
Creating the First Scene
This will be a long part. What I will do is to create a circle scene that was described in RVO2 samples. From the documentation of RVO2 this is how circle scene is explained:
“A scenario in which 250 agents, initially positioned evenly distributed on a circle, move to the antipodal position on the circle. There are no obstacles.”
I will use the circle scene and most of the code for using the RVO2 library and will use 100 agents. See here for the circle scene implementation with RVO2.
Scene Set up
Not much is required for this. Only thing you need is the main camera, directional light and one empty GameObject for attaching your main script that will manipulate the agents you will generate. It will be useful to name this to something like “RVOSimulator”.
Simulator Script
If you look at the examples provided, you will see that there is a general simulator which knows the location of the agents at all times and each time the positions are updated, simulator updates the agents locations.
That is what we will do as well. We will generate agents in a for loop, then we will update the agent locations every frame and update the simulator and will get the new positions.
RVO Vector
RVO agent positions are seen by the simulator as RVO vectors. I have a method that looks like the following for converting Unity’s Vector3 into RVO vector:
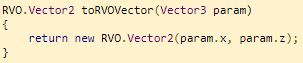
These methods are useful for translating the vectors from RVO into Unity and vica versa. I have another method to convert RVO vector to Unity vector:

Setting Up The Simulation and the Agents
Code for this will be in the start method.
You need to set up the scene variables and the time step. I will not go into detail on how they are decided since I think they are out of the scope for this tutorial. RVO2 has some default values already (see the examples they provided). I will use the values from the circle scene.

Then we need to initialize the agent locations that will be both in the scene and in the RVO2 simulation and their goal positions. Since their numbers are predefined, I initialize them with an array:Simulator is the RVO2 simulator instance.

It is time now for creating the agents around a circle. I will not go into details on the calculation since it is from the circle example from RVO2.
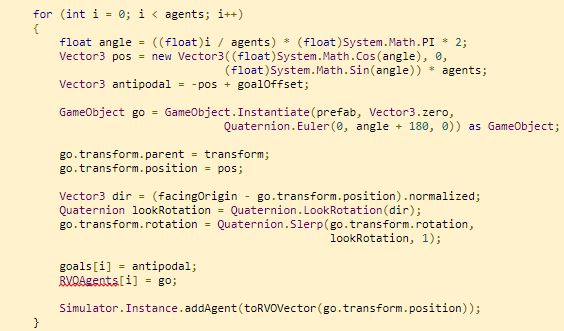
What we need to do now is to update the agent positions in the scene and in RVO simulator.What we did was that we created game objects in the scene with the “GameObject.Instantiate“ method. With the “Simulator.Instance.addAgent” method we added the agents position to the RVO simulator. Now the simulator knows there the agent is in the simulation.
Moving the Agents in the Scene and updating the Simulator in RVO
Basic procedure will be for each agent:
- Check if agent reached the goal
- If yes, do not update the position
- Get the agents new position from the RVO simulator
- Calculate goal direction
- Update agents position in RVO simulator and in Unity
- Move simulator one time step
We will repeat of course for each frame. Again this is also very simple.
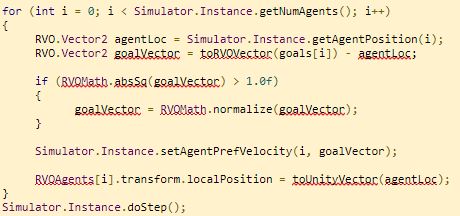
I hope this will help somebody somehow.And that is it. Line “Simulator.Instance.doStep();” moves the RVO simulator forward. That is how we let RVO simulator know that we are ready for the next step.
Putting Everything together
Now you should have a scene with a light, main camera, an empty game object which you will attach your script to and a folder (or not) with RVO2 scripts in it. In my computer scene looks like this:
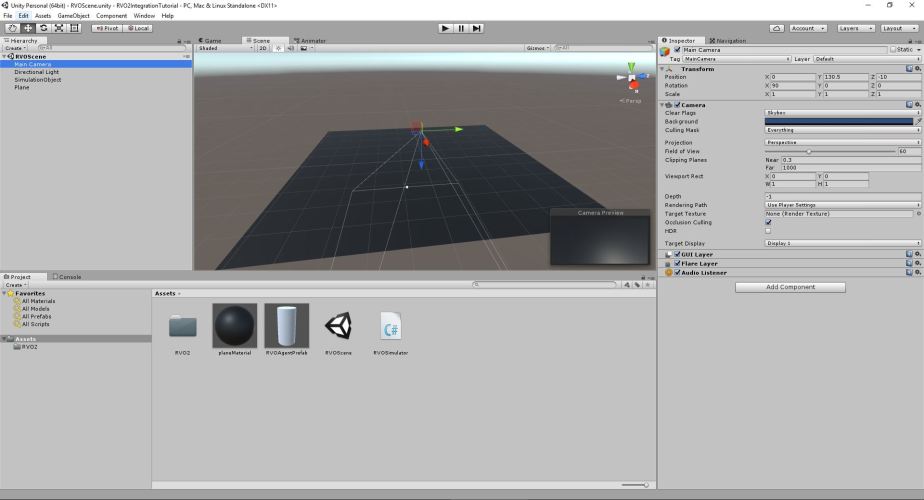
I created a prefab and a plane that has black material so it will be easier to see the objects. Ideally you want to have an interactive camera unlike mine. But that is it.
Deadlock
If you run what we have now with say, 20 agents you will get a deadlock like this:

I at first thought that the problem was with something I have done. Turns out however this is expected. I contacted authors about this and they told me that this is expected and I should dislocate one random agent a bit in order to avoid this.
So I did just that. Below is a simple illustration (I just added 3 points to the x location of a random agent):
There many ways you can improve but I just wanted to share what I have done. This my first time posting a tutorial and some things may not be clear. If so just ask.
Github: https://github.com/halitanildonmez/RVO2IntegrationTutorial/tree/master
In the upcoming days I will try to post a tutorial about using the RVO2 library for dynamic agent generation.

Hi Here I meet a bug.unit is allowed to move only be Instantiate in Start.if I spawn a unit after mousebutton. unit just stun
LikeLike